- "Extra Special" is The Jewelry Trend
-
laura james
Blog


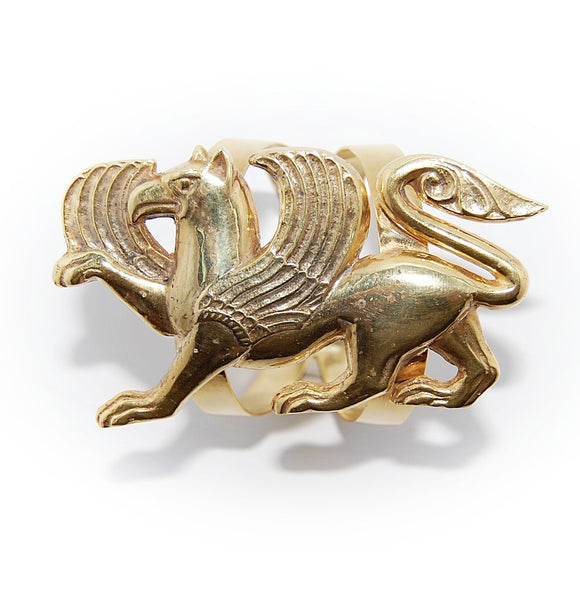
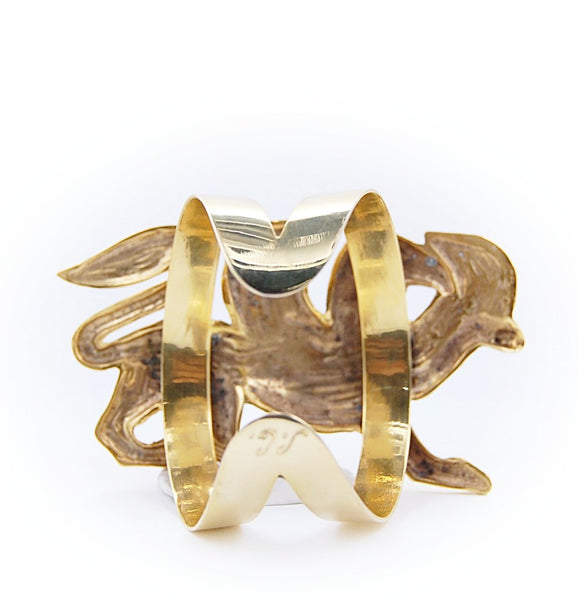
- Door Jewelry Has Arrived!
-
laura james
Since the Holiday wreaths are off (most of) the doors...my front door has never looked so bare! Now what?
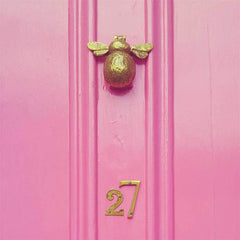
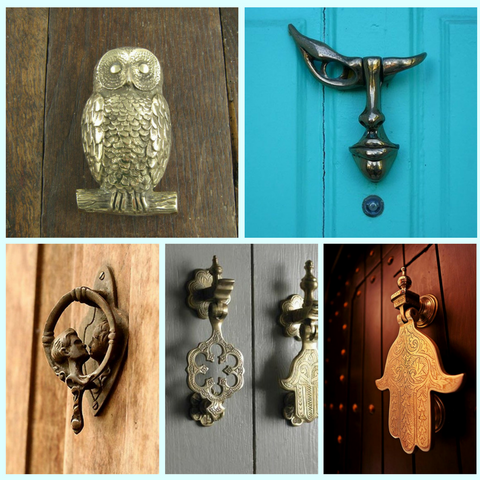
Well....what more perfect way is there to announce the fabulousness within your home than with an eclectic door knocker (door jewelry, in my mind!) like one of these pretties? I must, must have the Bumblebee!
Now off to paint my door pink :). Valentine's Day is on the horizon, right?!
xox,
Laura
p.s. grab your own Bumble Bee here for under $50 :)
photo cred. of bee by design sponge
- Wallpaper How-To Tutorial
-
laura james
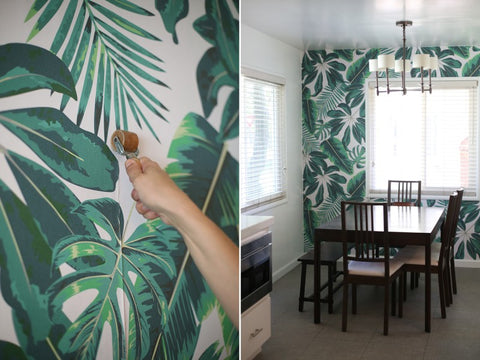
I LOVE Wallpaper. Love it. The idea of transforming a single wall, small space or even a shelf with a fun pattern just makes me smile.
However, the idea of installing it myself has been too daunting to put into words. Then, Remove-able Wallpaper came out and I thought, this is PERFECT for me! But, the patterns are not as diverse at the moment so...I thought, the time is now to find out just how to install my own Wallpaper so that I CAN when I WANT to at some point in the near future!
Luckily, I found a fabulous tutorial online- so, here ya go!
Wallpaper Installation by Lovely Indeed:
Start by trimming the white edges at the printed trim lines. It helps if you have a nice wide open space, so clear out the floor or a large table in the room where you’ll be working. Then flip your first wallpaper panel over and dampen the back side with a wet sponge. You’ll want to hang it after about 10 minutes of being damp.
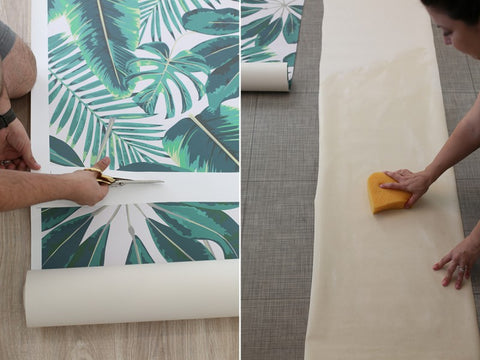
While the wallpaper is sitting and soaking the water, start applying your wallpaper adhesive to the walls. (Here’s where the process differs from lots of other wallpapers we researched — the adhesive goes right on the wall.) Roll or brush on a coat of adhesive in the area where your panel will go up. When the adhesive is on, apply your first panel to the wall. Be careful that you hang your first one (especially) straight — use a level or a plumb line to ensure that you’ve got it nice and even. Smooth the wallpaper on the adhesive. The Murals Wallpaper pieces come with some extra pattern printed on all sides for overlap, so once the first piece is hung use a razor blade to cut into the corners and cut away the excess. You can use a straight edge like a yardstick or a ruler to press the paper into a corner while you cut. Also cut away any paper that is covering light switches, etc.
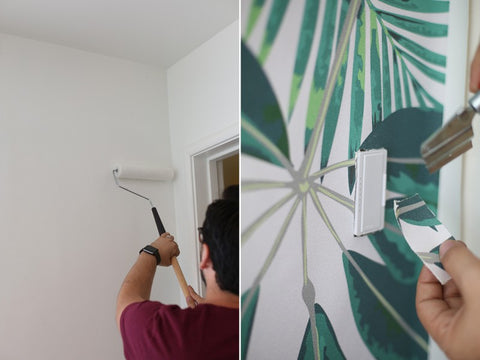
Once the first panel is up and trimmed, use a squeegee or a similar flat-edged tool to smooth out any air bubbles. Smooth them toward the outside edges of the wallpaper. If any excess glue seeps out, wipe it away quickly with a damp cloth. Start the process again with your next panel. When you’re hanging your next panel on the wall, you’ll have to make sure that the patterns match up as you hang. There will be some overlap in the pattern; this is okay. Get this next panel hung and adhered. If you’re hanging around a window or a closet, it’s easiest to hang the full panel and then trim the general window area with scissors, being careful not to leave a couple of extra inches around the window frame to work with. Once the paper is adhered, use the same razor technique as you did in the corners to trim around the window.
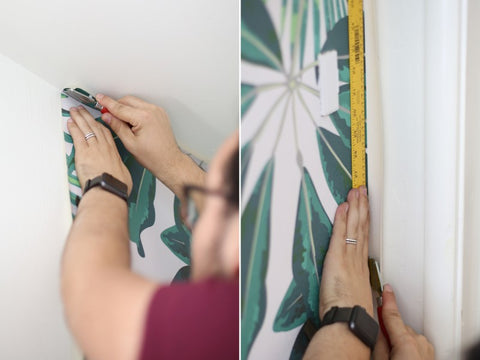
Then you’ll need to go back and trim your overlapped spots. Use a straight edge and cut the two overlapped papers, being careful not to cut too far to one side or the other — you want to cut in the middle of where they’re overlapped. Remove the excess paper from both sides. Then use a seam rolling tool (we used a brayer) to roll over the seam and ensure that it’s nice and flat. Repeat the process with every new panel of paper until your wall is covered!
Tutorial by Lovely Indeed. Murals Wallpaper featured.
- Jewelry Armoires for Us All
-
laura james
If you are reading this Jewelry blog, chances are that you, too, are also just as in love with jewels as we are at Laura James Jewelry! What starts as a sentimental gesture from a loved one can morph into a full-fledged love affair with all things Jewelry and Jewelry-related. We know, it happened to us, too!
As collections of any kind mature over time, the space to contain them often becomes an issue. I mean, you can only find so much space in a glass or lacquer box, no matter how many drawers it may have!
So, for those of you who struggle with just where and how to contain your Jewelry collections, here are a few nice options out there to check out below.
Enjoy!
xx-Laura
*Our Current FAVE!
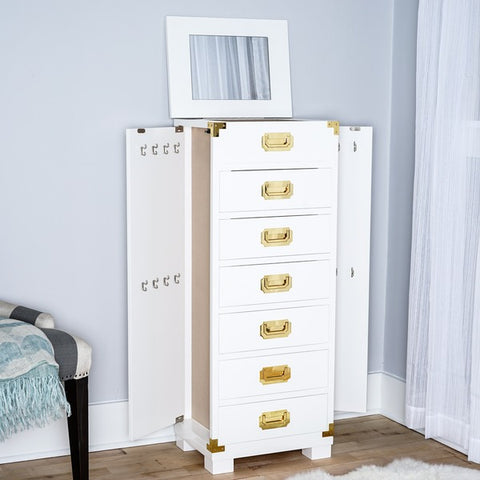
This Campaign-style Jewelry Armoire from Hives & Honey is sleek and fabulous with its Mid-Century style...available in both White and Dove Gray for $209.99 via HivesandHoney.com.
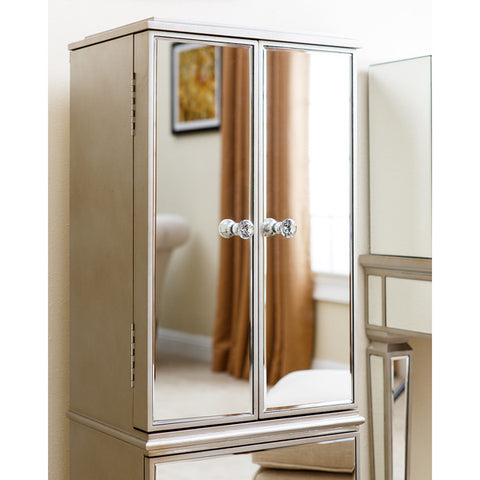
A mirrored lovely from Abbeyson Living... $500 via Houzz
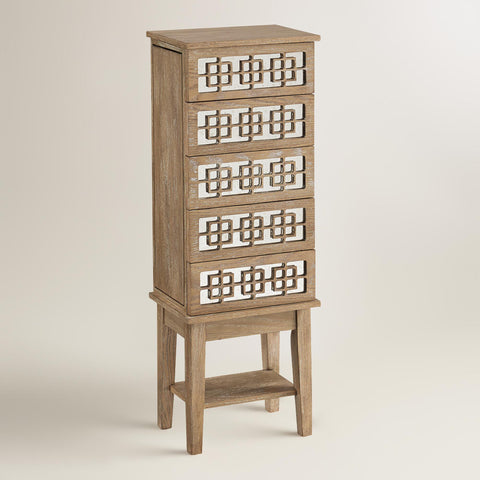
This wood + mirrored jewelry cabinet is just $159 via WorldMarket.com!
- DIY: Pretty Box Clutter
-
laura james
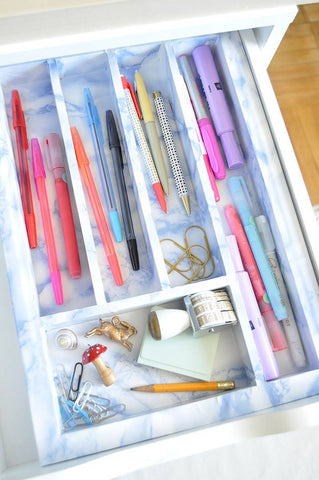
When I recently turned to Painting to get my creative jewelry mojo flowing, it really did work... so, now I am wondering if the same is true for various DIY projects?
I may have to give this Marbled lovely a try this weekend to find out (as my kitchen drawers never seem to stay organized!). Contact paper can really transform anything and truly...Pretty Box clutter doesn't stress me out nearly the way Ugly Box clutter does!
Here's a little tutorial from the gals at Design Sponge if anyone is up for the task...
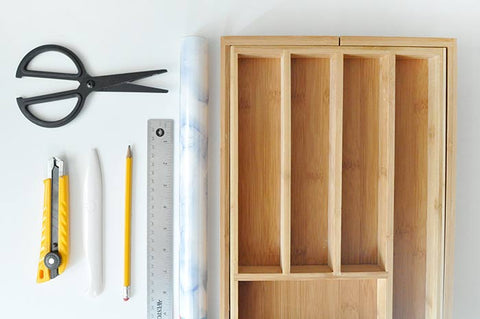
Supplies
-scissors
-craft knife
-bone folder
-pencil
-ruler
-marble contact paper (at least one full roll)
-drawer organizer (wooden with right angles is best — plastic curved ones will be trickier)
Step 1: Start by cutting a piece of contact paper to fit into a compartment. Use a ruler to measure the length and width of the compartment and draw this onto the back of the contact paper. Add panels onto each side to accommodate the depth of the compartment, and a little more still to cover the top surface.
Step 2: Peel the backing off of the contact paper piece you just cut. Cut the side tabs off of the backing and reattach onto the sticky contact paper, leaving the center as-is. This will help prevent the contact paper from getting stuck to itself in the next step.
Step 3: Carefully put the contact paper into the compartment, folding back the side tabs to keep them out of the way. Attach and smooth the center out as much as possible, trying to avoid creases and air bubbles. One at a time, remove the backing from the side tabs and smooth to adhere. As you go, gently slide the bone folder along the inner edges of the compartment to get a crisp edge. Be careful, though — if you press too hard with the bone folder, the contact paper will tear.
 Step 4: Attach and smooth the excess over the top surface of the organizer. Use a craft blade to carefully remove any contact paper that extends past the top edges.
Step 5: Repeat for the remaining compartments. Since my organizer had three identical compartments, I measured and drew one onto the back of the contact paper, cut it out, and then used that to trace two identical shapes for the matching compartments. Don’t worry about the gaps in the corners just yet!
Step 6: For any small gaps on the top surface (excluding the outer-most edge), I cut and attached a scrap of contact paper into an abstract blob (the round, natural shape blends in better than a straight edge) to fit the space. If some of your compartments have gaps where the contact paper doesn’t quite meet, do the same. If your contact paper isn’t adhering in some spots, try applying a thin layer of white glue with a paintbrush where you’re noticing the problem.
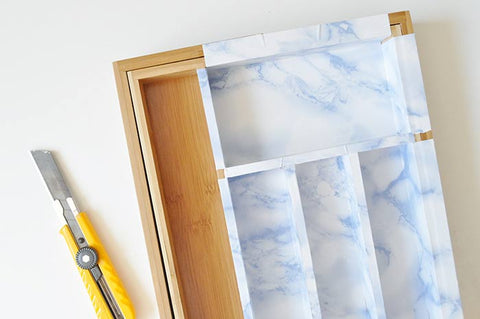
Step 7: To finish up, trace the exterior sides onto the back of contact paper, leaving excess tabs to wrap under the organizer for a nice edge and to wrap onto the top surface to cover any of those gaps from before. Once everything is adhered and as smooth as possible, use the craft knife to carefully remove any remaining excess.
VOILA!
photos + post
designsponge.com