s
Blog
Flower Power!

Japanese Magnolia Blooms

If you happen to live in Charlotte, North Carolina, have you noticed the gorgeous pink Yoshino Cherry trees in full bloom? It's something I just noticed this week on Valentine's Day...everywhere I looked I saw shades of Pink. Maybe it's always been this way, but I am finally putting two and two together...only took me 40 years! ;)

Even neater to me was that my favorite Japanese Magnolia blooms opened on...you guessed it, Valentine's Day!

The bright Fuchsia color has certainly inspired me and I can't wait to see what Jewelry comes from this beautiful nod to Nature, one of my largest sources of inspiration.

How about you? Had you noticed the pink blooms coinciding with the month of Love? 

Another reason I have flowers on the bloom is the fact that this season it's all about Floral. You'll see it in boutiques and online, just as I reported earlier the Sag Award dresses hinted of the trend. I couldn't be more thrilled. My inner Flower Child is even making a flower crown as we speak ;).

Here's to Spring!

Laura

Sag Award Jewelry + Fashion 2017

FLOWER POWER

Sag Best Dressed List 2017

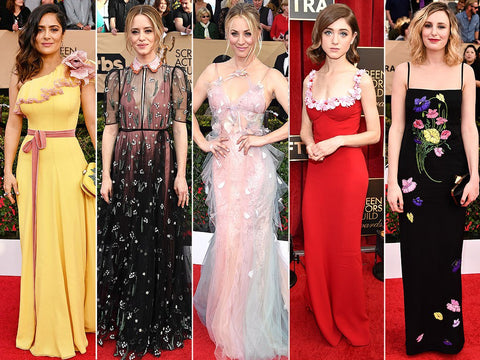
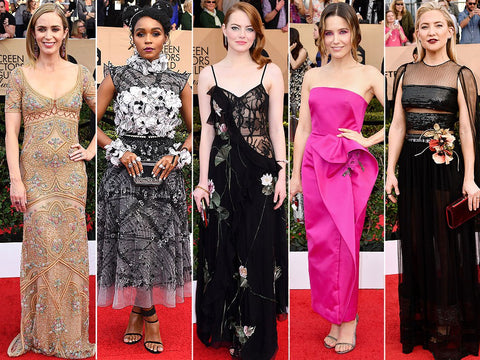
It's safe to say that FLORAL is in the air for Spring, seeing as so many stars were sporting flowers on their gowns at last night's 2017 Sag Awards.

Floral trend at 2017 Sag Awards last night

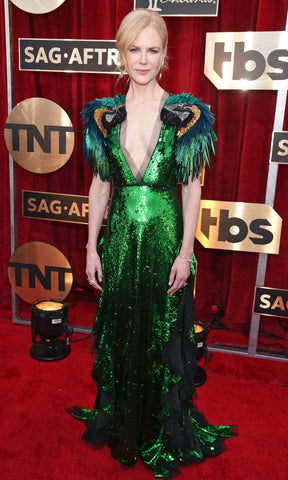
And our fave best-dressed star absolutely goes to Nicole Kidman...as a Parrot. LOVE!

Nicole Kidman Parrot Dress at the Sag Awards

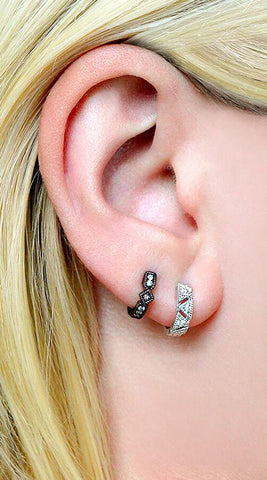
Fave jewelry of the night? Kate Hudson rocking the "Huggie" diamond earring (they literally "hug" the lobe) -in several ways. The diamonds had an edgier appearance set in rhodium, and I loved every minute of them.  I've been waiting for this style to make a comeback for some time now...Huggies are not (typically) heavy plus they are a perfect alternative to the tried and true Stud earring. 

Kate Hudson in Diamond Huggie Earrings at the Sag Awards 2017

Dana Rebecca Huggies

Now, I am off to dig out my own Huggies from the Jewelry box...
xox- Laura James


Photos: People

Huggies: Dana Rebecca Designs

Copper Pumpkin Tutorial

Ok, this is officially one of the coolest uses of Metal I have seen in some time outside of the Jewelry realm!

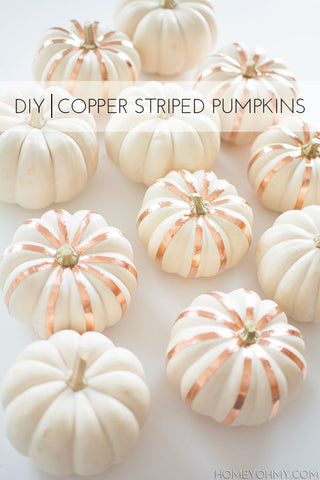
With all of the Pumpkins we're seeing around these Fall days, I think this idea using luxe metallic Copper trumps them all!

Simply gorgeous.

DIY Striped Pumpkins with Copper on the Laura James Jewelry blog


Here's the one-step (!) tutorial if you'd like to make your own DIY pumpkins this Fall holiday season!

From Blog: HomeyOhMy

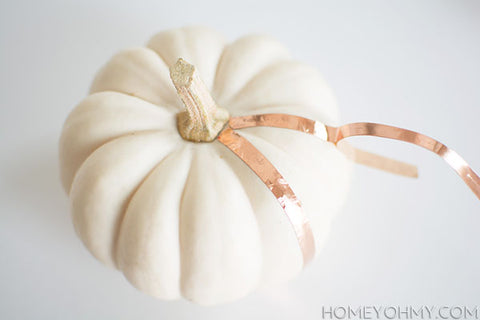
1. Apply strips of this copper tape down the sides of the pumpkins in between each groove, peeling the backing while at the same time smoothing over the tape your fingers.

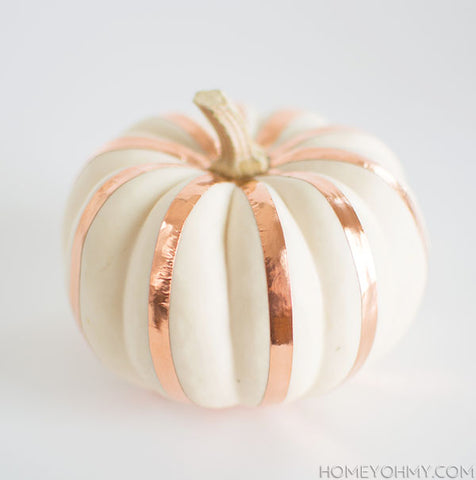
Metal Pumpkin DIY Tutorial on the Laura James Jewelry Blog

That is IT! Have fun.

:) Laura

Copper Tape Pumpkins on the Laura James Jewelry blog


Jewelry Armoires for Us All

If you are reading this Jewelry blog, chances are that you, too, are also just as in love with jewels as we are at Laura James Jewelry! What starts as a sentimental gesture from a loved one can morph into a full-fledged love affair with all things Jewelry and Jewelry-related. We know, it happened to us, too!

As collections of any kind mature over time, the space to contain them often becomes an issue. I mean, you can only find so much space in a glass or lacquer box, no matter how many drawers it may have!

So, for those of you who struggle with just where and how to contain your Jewelry collections, here are a few nice options out there to check out below.

Enjoy!
xx-Laura


*Our Current FAVE!

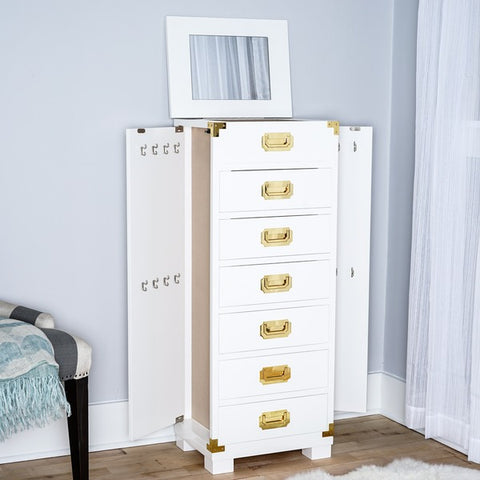
This Campaign-style Jewelry Armoire from Hives & Honey is sleek and fabulous with its Mid-Century style...available in both White and Dove Gray for $209.99 via HivesandHoney.com.

Hives and Honey Campaign White Jewelry Armoire Storage Chest on the Laura James Jewelry Blog

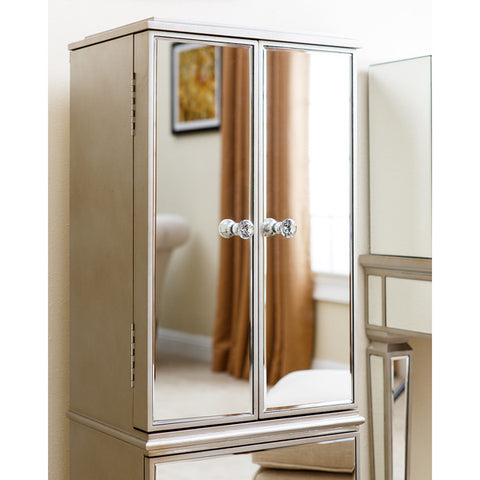
A mirrored lovely from Abbeyson Living... $500 via Houzz

Abbyson Living Mirrored Jewelry Storage Chest Armoire

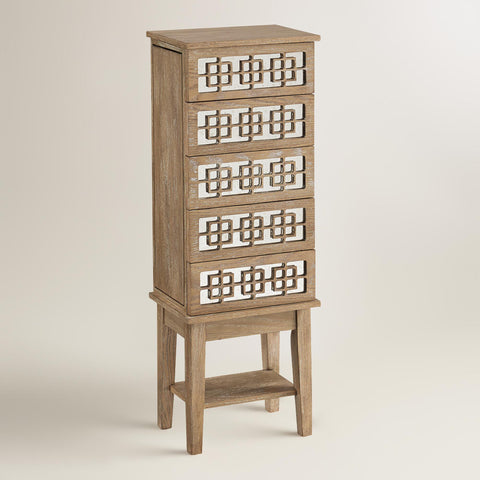
This wood + mirrored jewelry cabinet is just $159 via WorldMarket.com!

World Market Wood Jewelry Storage Chest on the Laura James Jewelry Blog


DIY: Pretty Box Clutter

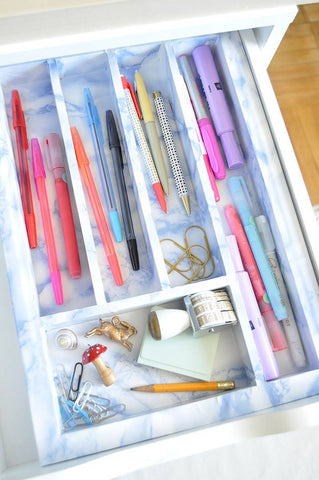
DIY Marbled Organizer Tutorial from Design Sponge on the Laura James Jewelry Blog!

When I recently turned to Painting to get my creative jewelry mojo flowing, it really did work... so, now I am wondering if the same is true for various DIY projects?
I may have to give this Marbled lovely a try this weekend to find out (as my kitchen drawers never seem to stay organized!). Contact paper can really transform anything and truly...Pretty Box clutter doesn't stress me out nearly the way Ugly Box clutter does!
Here's a little tutorial from the gals at Design Sponge if anyone is up for the task...


Supplies

-scissors
-craft knife
-bone folder
-pencil
-ruler
-marble contact paper (at least one full roll)
-drawer organizer (wooden with right angles is best — plastic curved ones will be trickier)
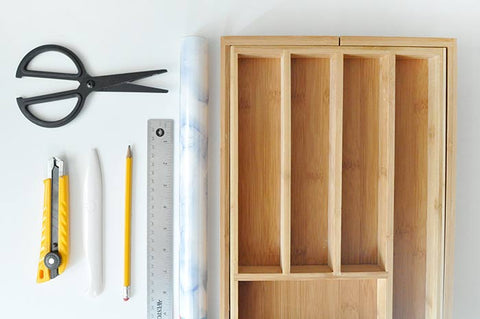
DIY Drawer Organizer from Design Sponge on the Laura James Jewelry Blog

Step 1: Start by cutting a piece of contact paper to fit into a compartment. Use a ruler to measure the length and width of the compartment and draw this onto the back of the contact paper. Add panels onto each side to accommodate the depth of the compartment, and a little more still to cover the top surface.

Step 2: Peel the backing off of the contact paper piece you just cut. Cut the side tabs off of the backing and reattach onto the sticky contact paper, leaving the center as-is. This will help prevent the contact paper from getting stuck to itself in the next step.

Step 3: Carefully put the contact paper into the compartment, folding back the side tabs to keep them out of the way. Attach and smooth the center out as much as possible, trying to avoid creases and air bubbles. One at a time, remove the backing from the side tabs and smooth to adhere. As you go, gently slide the bone folder along the inner edges of the compartment to get a crisp edge. Be careful, though — if you press too hard with the bone folder, the contact paper will tear.
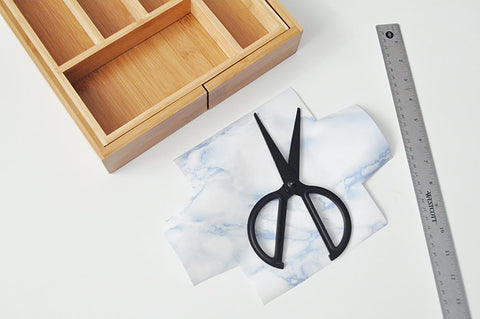
 

DIY Organizer with Marbled Contact PaperStep 4: Attach and smooth the excess over the top surface of the organizer. Use a craft blade to carefully remove any contact paper that extends past the top edges.

Step 5: Repeat for the remaining compartments. Since my organizer had three identical compartments, I measured and drew one onto the back of the contact paper, cut it out, and then used that to trace two identical shapes for the matching compartments. Don’t worry about the gaps in the corners just yet!

Step 6: For any small gaps on the top surface (excluding the outer-most edge), I cut and attached a scrap of contact paper into an abstract blob (the round, natural shape blends in better than a straight edge) to fit the space. If some of your compartments have gaps where the contact paper doesn’t quite meet, do the same. If your contact paper isn’t adhering in some spots, try applying a thin layer of white glue with a paintbrush where you’re noticing the problem.
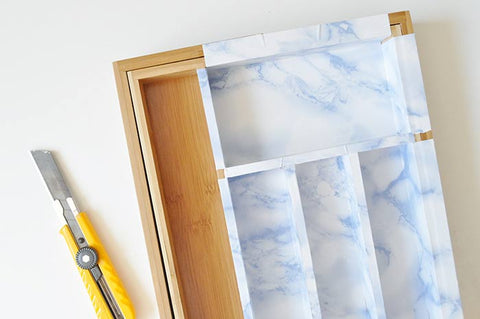
DIY organizer for your drawer

Step 7: To finish up, trace the exterior sides onto the back of contact paper, leaving excess tabs to wrap under the organizer for a nice edge and to wrap onto the top surface to cover any of those gaps from before. Once everything is adhered and as smooth as possible, use the craft knife to carefully remove any remaining excess.


VOILA!
 

DIY Drawer organizer from design sponge on the laura james jewelry blog
photos + post
 designsponge.com