
I LOVE Wallpaper. Love it. The idea of transforming a single wall, small space or even a shelf with a fun pattern just makes me smile.
However, the idea of installing it myself has been too daunting to put into words. Then, Remove-able Wallpaper came out and I thought, this is PERFECT for me! But, the patterns are not as diverse at the moment so...I thought, the time is now to find out just how to install my own Wallpaper so that I CAN when I WANT to at some point in the near future!
Luckily, I found a fabulous tutorial online- so, here ya go!
Wallpaper Installation by Lovely Indeed:
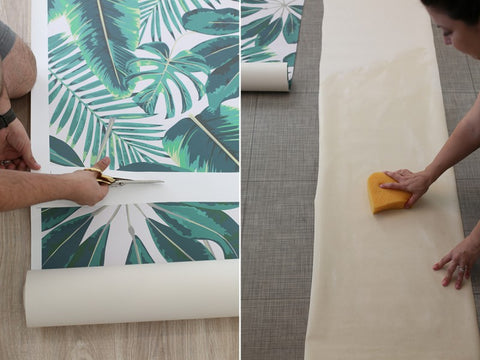
Start by trimming the white edges at the printed trim lines. It helps if you have a nice wide open space, so clear out the floor or a large table in the room where you’ll be working. Then flip your first wallpaper panel over and dampen the back side with a wet sponge. You’ll want to hang it after about 10 minutes of being damp.
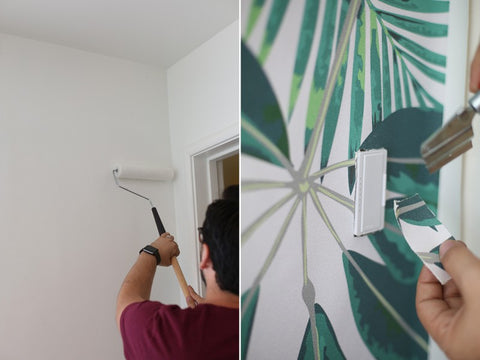
While the wallpaper is sitting and soaking the water, start applying your wallpaper adhesive to the walls. (Here’s where the process differs from lots of other wallpapers we researched — the adhesive goes right on the wall.) Roll or brush on a coat of adhesive in the area where your panel will go up. When the adhesive is on, apply your first panel to the wall. Be careful that you hang your first one (especially) straight — use a level or a plumb line to ensure that you’ve got it nice and even. Smooth the wallpaper on the adhesive. The Murals Wallpaper pieces come with some extra pattern printed on all sides for overlap, so once the first piece is hung use a razor blade to cut into the corners and cut away the excess. You can use a straight edge like a yardstick or a ruler to press the paper into a corner while you cut. Also cut away any paper that is covering light switches, etc.
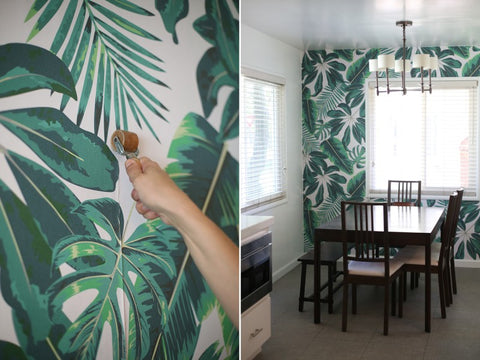
Once the first panel is up and trimmed, use a squeegee or a similar flat-edged tool to smooth out any air bubbles. Smooth them toward the outside edges of the wallpaper. If any excess glue seeps out, wipe it away quickly with a damp cloth. Start the process again with your next panel. When you’re hanging your next panel on the wall, you’ll have to make sure that the patterns match up as you hang. There will be some overlap in the pattern; this is okay. Get this next panel hung and adhered. If you’re hanging around a window or a closet, it’s easiest to hang the full panel and then trim the general window area with scissors, being careful not to leave a couple of extra inches around the window frame to work with. Once the paper is adhered, use the same razor technique as you did in the corners to trim around the window.
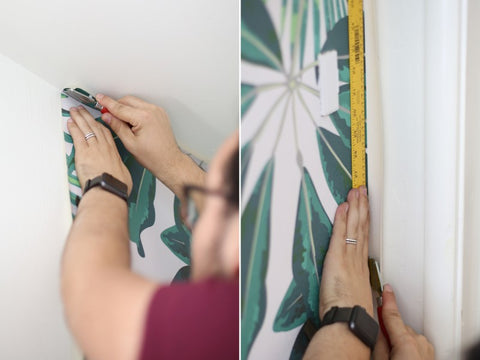
Then you’ll need to go back and trim your overlapped spots. Use a straight edge and cut the two overlapped papers, being careful not to cut too far to one side or the other — you want to cut in the middle of where they’re overlapped. Remove the excess paper from both sides. Then use a seam rolling tool (we used a brayer) to roll over the seam and ensure that it’s nice and flat. Repeat the process with every new panel of paper until your wall is covered!
Tutorial by Lovely Indeed. Murals Wallpaper featured.
-
laura james
Comments on this post ( 0 )