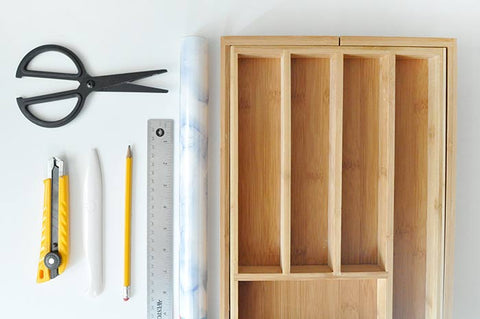
Supplies
-scissors
-craft knife
-bone folder
-pencil
-ruler
-marble contact paper (at least one full roll)
-drawer organizer (wooden with right angles is best — plastic curved ones will be trickier)
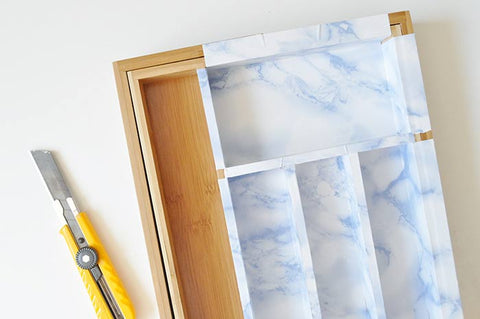
Step 1: Start by cutting a piece of contact paper to fit into a compartment. Use a ruler to measure the length and width of the compartment and draw this onto the back of the contact paper. Add panels onto each side to accommodate the depth of the compartment, and a little more still to cover the top surface.
Step 2: Peel the backing off of the contact paper piece you just cut. Cut the side tabs off of the backing and reattach onto the sticky contact paper, leaving the center as-is. This will help prevent the contact paper from getting stuck to itself in the next step.
Step 3: Carefully put the contact paper into the compartment, folding back the side tabs to keep them out of the way. Attach and smooth the center out as much as possible, trying to avoid creases and air bubbles. One at a time, remove the backing from the side tabs and smooth to adhere. As you go, gently slide the bone folder along the inner edges of the compartment to get a crisp edge. Be careful, though — if you press too hard with the bone folder, the contact paper will tear.
 Step 4: Attach and smooth the excess over the top surface of the organizer. Use a craft blade to carefully remove any contact paper that extends past the top edges.
Step 5: Repeat for the remaining compartments. Since my organizer had three identical compartments, I measured and drew one onto the back of the contact paper, cut it out, and then used that to trace two identical shapes for the matching compartments. Don’t worry about the gaps in the corners just yet!
Step 6: For any small gaps on the top surface (excluding the outer-most edge), I cut and attached a scrap of contact paper into an abstract blob (the round, natural shape blends in better than a straight edge) to fit the space. If some of your compartments have gaps where the contact paper doesn’t quite meet, do the same. If your contact paper isn’t adhering in some spots, try applying a thin layer of white glue with a paintbrush where you’re noticing the problem.
Step 7: To finish up, trace the exterior sides onto the back of contact paper, leaving excess tabs to wrap under the organizer for a nice edge and to wrap onto the top surface to cover any of those gaps from before. Once everything is adhered and as smooth as possible, use the craft knife to carefully remove any remaining excess.
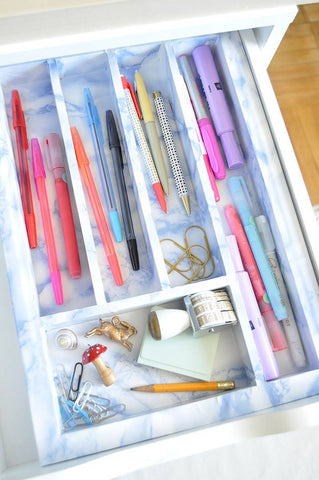
VOILA!