s
Blog
Carried Away

Laura James Painting

Hi Guys! How is everyone's Summer going?!


I cannot believe we are already here into August...I don't remember when Time flew so fast in my life. However, that is likely due to the fact that so much has changed work-wise for me these past couple of months...

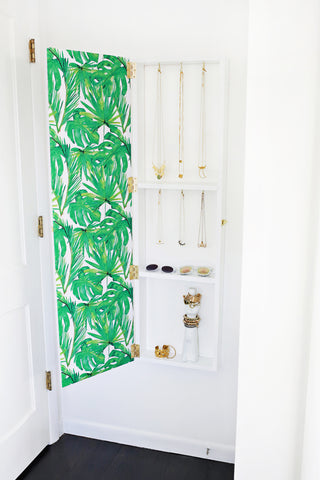
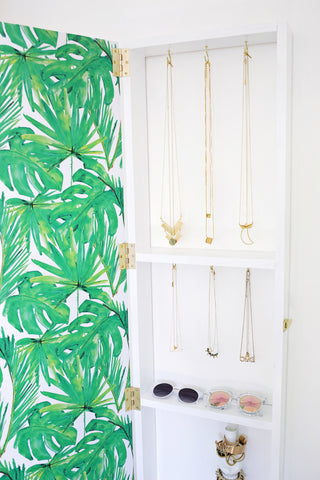
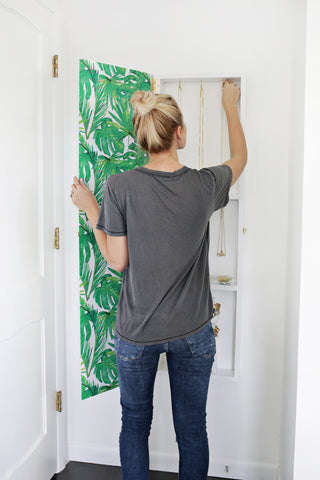
Since moving out of my physical storefront this past June where I have operated Laura James Jewelry the past 7 of the 11 years I have been in business, (I have missed seeing your faces so much!) I have truly enjoyed this bit of a "Break" that I have been on...by the way, this totally dates me, but I can still hear Ross yelling at Rachel "We were on a B R E A K!" at the very mention of the word!

ANYwho, this Break for me has been both amazing and hard at the same time. I didn't realize until now just how programmed I was to Work, Work, Work. It shouldn't really be that much of a surprise to me, seeing as I have spent all of my days since 2005 building Laura James Jewelry from the ground up. I have found it's actually quite tough to dramatically switch gears when you've been doing something a certain way the past 7 years!


As soon as my traveling all over the place slowed down - literally, if you had called me and said, "Laura get in the car/plane/train and come visit", I would have been there! Traveling to see family and friends during the Summers is something I wanted to do for so long- finding the momentum to switch into this next Online and Pop Up phase for Laura James Jewelry has been daunting, to say the least! 

First of all, it has taken me weeks since I have been home to stop the voices in my head pushing me to Make Jewelry, Build The Business, constantly Post on Social Media, etc. etc., I am finally in a space where I am taking a real breath, finding new inspiration, and relying on my instinct to Listen to myself instead of Telling myself. 

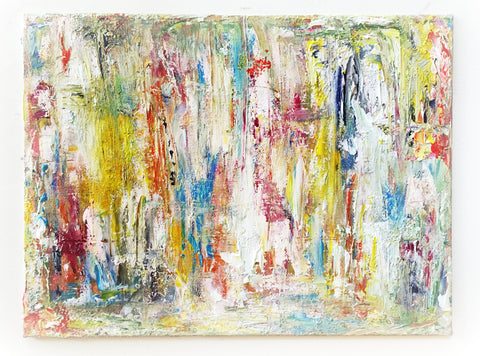
So, to jolt the Creativity in me, I have decided a little Painting might be in order these days... 

Painting Mess


Painting. It is something that has always alluded me.

My Aunt Lewellyn (Lou Jordan) is a very gifted Painter in Charlottesville, and those artistic veins run thick through my Father's side of the family. I have never "figured out how to Paint", and that has always bothered me! I watch my daughter, Lila, who was born with an Abstract brush stroke that I would give anything for (!), effortlessly move her pre-school hands around a canvas. She even tried to teach me now to move my brush "the way she was", believe it or not. She's Three! Sigh.

So, today was my first real attempt at this whole Paint game. Well, I found it is MUCH harder (and messier!), than I could have imagined. But, it was...Fun. I am happy to say, I got that "carried away" feeling I have always had making Jewelry. No clue what time it is, just having a good time in the moment. This small 9x12" piece took me much longer that I would have imagined, but I thoroughly enjoyed the process...and learned that my fingers work much better in paint than trying to use a brush!

Laura James Jewelry painting


Thanks for sticking with me this far down this post...you're a real trooper for spending your time with me today! And yes, I definitely DO have a BIG online Jewelry SALE in the works SOON, so stay tuned (or you can add yourself to the list to be notified ahead of time when it begins here: http://bit.ly/1t7BQa2).


Till next time!
xox-Laura


#arty #creativeprocess #painting #creativelifehappylife

Jewelry Trend : Coin Me!

 
Gold Coin Trend in Jewelry on the Laura James Jewelry blog It's always fun to see a Jewelry Trend emerge like this Coin Jewelry trend for Fall 2016 from the John Galliano runway...especially when it's a trend I have previously embraced!


I introduced vintage silver and gold Coins into my jewelry collections over the past year more for initially for sentimental reasons...I had acquired a large lot of my grandmother's coins from her travels abroad, too many to hang onto. With my Father's encouraging, I started to sprinkle them into my current one of a kind necklaces and bracelets (photo below). And then...cue the madness!

People were coming to my website and storefront in droves to either buy them or bring their own family coins in to have me work them into a new design or add them to a design. 
Gold Coin Bracelet Jewelry Trend from Laura James Jewelry

             Coin Bracelet from  Laura James Jewelry, 2015

Just like that, I saw how attached people were to Coins. They seemed to signify a place in time for them, and they intrigued others just as they did me.


You see, I never knew my Grandmother on my Father's side. She had passed away before I was born and these coins (along with a few cherished black and white photos) are really all I have of her. The coins show me a little bit about her. She was a Collector, for one...(like me!) and she loved to travel, especially overseas. She was a Seeker...like me.


Do you have a special coin in your keepsake box? Please tell its story in the comments below, if so! 
xox-Laura

DIY Marbled Clay Ring Dishes

DIY Jewelry Dishes on the Laura James Jewelry Blog 

These Marbled Clay Bowls are just plain stunning, don't you think?! I cannot believe these are the result of a DIY project! They are the perfect answer to me- not only are they eye candy, but I am always looking for places to put my rings when I take them off.

Apparently such was the case with the gals at @ABeautifulMess since they came up with this gorgeous solution... AND have offered to show us exactly how they made these beauties! Check it out...

 DIY Tutorial for Jewelry Bowls

Author: Laura Gummerman 

@ABeautifulMess

Supplies:
-White, Black and Colored oven bake clay (a few ounces of colored clay and the 1.75 pound white clay will make you several dishes!)

-X-Acto knife or plastic clay knife
-small bowl or baking ramekin that is oven safe
-gold liquid gilding and small paintbrush
-rolling pin or large round jar
-large can or jar to trace around
-glaze to seal dish (optional)


1. Roll each color of clay that you want to use into a snake about 5" long. I usually make two larger rolls of white, a medium roll of grey, a small roll of any color I am using, and then an extra small roll of black. I don't have exact clay measurements for you (and most people don't have a scale to weigh exact ounces of clay anyways) so just use the photo as a guide. You basically want enough total clay to roll out a 6" circle, but don't worry about getting exact amount of one color or another, even if you use the same recipe every time, each dish will look different.

2. Combine the smaller rolls into one big roll and twist together.

3.  Roll the large twist into a snake about twice the original length to combine the colors. Twist the ends opposite ways after every few motions to give the colors more of a candy cane look. Once it's twice the length, fold the snake in half and twist the two ends together, as pictured above. Repeat the rolling, folding, twisting, and rolling again process 2-3 times. 

4. Smoosh all the clay into a ball. You want to see most of your colors on the surface of the ball, so pull the ball in half and re-smoosh together if you don't. 

5. Use a rolling pin or glass jar to roll out your marbled ball. I like to use a glass jar so I can see what is happening as I roll harder or softer over certain colors. The colors should blend together and create a marbled pattern as you roll over it. Try rolling different directions, from the edge, from the center, etc. to push the clay from different angles. Roll to 1/4" thick.

6. Use a round item about 6" wide as a template and cut out your dish circle with an X-Acto or clay knife.

7. Place your circle gently into a oven-safe bowl or ramekin that is a little smaller than your circle so it will sag a little in the center and give you more of a dish shape. Bake the bowl according to the temperature on the clay package (mine was 15 minutes at 275°F). Remove the bowl from the oven and allow the clay to cool before turning the larger bowl upside down and tapping lightly until the clay dish falls out.

8. Once the clay is completely cool, use a small brush to paint the rim of the dish and allow the paint to dry. Seal the dish with a glaze if you desire. The glaze won't make the item food safe or totally waterproof, but it will give you a glossy finish if that's what you're into :)

Since you are working with oven bake clay the dish will still be a tiny bit flexible when when cooled and feel more like hard rubber than porcelain, but that's ok! It should still keep it's shape perfectly fine and hold your rings like a champ.

While the color combinations are endless, my favorites were made with white, grey, black, and two bright colors that make a pretty third color when mixed. I would definitely suggest using a oven-bake clay like Sculpey that is already soft to start with. It will save you a lot of time and finger strength than if you use the clay that requires a lot of kneading to get it to that softness.

These bowls turned out even better than I hoped they would, and you can see I was able to make quite a few of them, so I'll definitely be giving a few away as gifts. How cute would one of these be as a present with a piece of jewelry already in it? xo. Laura

Credits // Author: Laura Gummerman. Photography: Laura Gummerman and Sarah Rhodes. 

Finally, A Cool Jewelry Organizer!

Cool Jewelry Organizer Storage on the Laura James Jewelry Blog

Yes, it's true...there is definitely a lack of cool Jewelry Organizers out there in the world! It's actually of the top requests I got from customers when I had my storefront in Charlotte.

I pretty much had given up on finding one...until I came across this post for this very cool DIY jewelry organizer that you can create yourself if you love a craft project.

DIY Jewelry Storage Organizer on the Laura James Jewelry Blog

Finally...something functional that doesn't scream "i'm a jewelry organizer"! I especially am in love with the remove-able palm frond wallpaper from Chasing Paper that she used here...to me, it's the best part about this piece.

DIY Jewelry Storage Organizer on the Laura James Jewelry Blog

For those of you who want to DIY one of these for your room, here is the link to the tutorial from the post on the A Beautiful Mess blog.
(Please post a pic if you make one! Would love to see how it turns out.)

Have fun!
xox-Laura

Tutorial and pics from: A Beautiful Mess

A Willing Time Traveller
Harry Potter Time Turner Necklace


I recently came across an article"Collecting Is About More Than Just Stuff" that answered a big question for me: WHY am I a Collector?

Many of us collect something...and for me, it's Jewelry (big surprise!), especially jewelry with a vintage date :).  Bits of the article really resonate with me and shed light on why I have been collecting Jewelry all of my life. Well, I learned I am basically Preserving Memories. For What? I assume, when my brain (which is already overloaded with everything from the ins and outs of being a wife, mother to a spirited three year old, and a business owner) fails me in the memory department, I can count on something to instantly transport me back in time. Watching my toddler grow in leaps and bounds right before my eyes has made me more aware of Time than ever, and, believe me, I am a willing Time Traveller!

I credit my parents, who presented me with my first "real" piece of Jewelry for my 6th Grade Graduation, as the originators of my love for collecting Jewelry. It was a delicate, sparkling turquoise Blue Topaz ring set in gold. Two small, heart-shaped stones and two small diamonds. I have still never seen another color like it to this day. I cherished that ring, I was proud of it...proud that I was now responsible enough to be trusted to take care of something nice. Which only lasted a few years when my precious ring found its way to the Ocean Floor in the Florida Panhandle. It's been 20+ years and I am still not over losing it! The memory of this ring being my first, but also my first loss. The stinging memory (that keeps me aware and careful of what I am wearing to this very day!) is as clear now as it was all those years ago...
          I am diving under the shallow waves, frantically feeling deep into the sand, uncovering seashells...but not my Ring. The pit in my stomach. The helplessness I feel as I realize I am no match for the Tide, burying my precious treasure on its floor with all of the others. Why, why did I think it was a good idea to switch the ring to my other hand in the middle of the Ocean?! The security of it being on the other finger, which it fit more snugly on, that's Why. But, then that rogue wave hits me, and the ring falls from my fingertips just as I am transferring it to the safety of my larger finger...gone. Where's a Metal Detector when you need one?!

Like a song, Jewelry transports me through the years. I am instantly "there". Just touching the pearl choker necklace in my jewelry box, it's suddenly 1995 and I am excitedly opening its velvet gray box with my parents looking on, just before we jump in the car to my High School graduation...                                                                   My first real set of Pearls! I am overjoyed. This means I am an adult, at last, right? My dress is a soft off-white silk with a ruffle at the bottom that hits just above my knee. My strappy patent leather sandals are uncomfortable, but I can mush through since they are luckily not high heels. I can't stand it when my feet hurt, and since I'll be on them for hours, no staggering heels for me! My hair is long down my back and I am not, I repeat, not excited about putting on that generic navy blue cap and gown with its gold tassel hanging in my face! Uggg. A Uniform. An absolute death sentence for Creatives....

Ok, I am sure by the length of this post (if you are still reading this!), you definitely get the point! Wow, that was a fun trip down memory lane, thanks for humoring me and coming along. I think I could use one of those Harry Potter Time Turner necklaces pictured above!

How about you? What transports you through time?
xox- Laura

p.s: click here for the article that I mentioned at the top of this post

photo: Harry Potter #TimeTurner Necklace